Did you know that post-processing can transform a mediocre automotive photo into a stunning masterpiece? By utilizing powerful editing techniques, you can enhance the colors, details, and overall impact of your automotive pictures, capturing the essence and beauty of these machines in a whole new light.
So, why settle for ordinary when you can take your automotive photography to the next level with post-processing? The art of post-processing has revolutionized automotive photography, allowing photographers to bring out the full potential of their images. Through the use of editing software, you can adjust the exposure, fine-tune the colors, and sharpen the details, creating captivating and professional-looking photos.
In fact, studies have shown that Enhance Your Automotive Photos dramatically improve the visual appeal of automotive images, leading to increased engagement and interest from viewers. Whether you’re a professional photographer or an avid car enthusiast, harnessing the power of post-processing can help you capture the true beauty and essence of automobiles in your photography, making each image a true work of art.
You don’t need to be a professional photographer to enhance your automotive photos with post-processing techniques. With the right tools and techniques, you can make your car photos stand out and look more professional. From adjusting colors and exposure to removing distractions and adding special effects, post-processing can transform your automotive photos. Experiment with different editing software, learn new techniques, and let your creativity shine through.

Enhance Your Automotive Photos With Post-Processing
Enhance Your Automotive Photos is all about capturing the beauty and power of cars. But sometimes, even with the best camera and lighting conditions, the images may need a little extra touch to truly shine. That’s where post-processing comes in.
In this article, we’ll explore how you can enhance your Enhance Your Automotive Photos through various post-processing techniques and tools, allowing you to create stunning visuals that showcase the allure of these incredible machines.
The Power of Post-Processing
When it comes to Enhance Your Automotive Photos, post-processing can be a game-changer. It allows you to fine-tune the colors, contrast, and overall look of your images to bring out the best in each frame. From enhancing the sky to removing distracting elements, the possibilities are endless. By harnessing the power of post-processing, you can transform an ordinary photo into a mesmerizing work of art that captures the essence of the car and evokes emotions in the viewer.
The Basics of Post-Processing
Before we dive into the nitty-gritty of post-processing techniques, it’s important to have a basic understanding of the tools and software available. The most popular software for post-processing is Adobe Photoshop and Lightroom. These programs offer a wide range of editing features and allow for non-destructive editing, meaning you can always revert back to the original image if needed.
Additionally, there are many online tutorials and courses available that can help you master the art of post-processing and make the most out of your automotive photos.
When starting your post-processing workflow, it’s crucial to work with high-quality RAW files. RAW files contain all the image data captured by your camera’s sensor, giving you more flexibility during the editing process.
Shooting in RAW ensures that you have the best possible starting point for your post-processing journey. Once you have your RAW files ready, you can begin exploring different techniques to enhance your automotive photos.
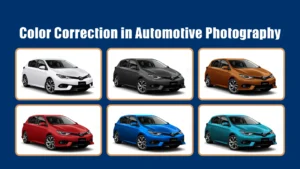
Color Correction and Enhancement
One of the key aspects of post-processing is color correction and Enhance Your Automotive Photos. This involves adjusting the white balance, saturation, and vibrance of your image to make the colors pop and create a more visually appealing result. When it comes to automotive photography, you want the colors of the car to be accurate and vibrant, while still maintaining a natural look. Use the color adjustment tools in your editing software to fine-tune the hues and tones, ensuring the car’s paintwork looks its best.
Another useful technique for color enhancement is selective color editing. This allows you to highlight specific areas of the car by desaturating or intensifying certain colors. For example, you can make the car’s red paintwork stand out even more by reducing the saturation of surrounding colors. This creates a visually captivating effect that draws the viewer’s attention to the car’s design and details.
Sharpening and Detail Enhancement
When capturing automotive photos, you want to showcase every little detail of the car, from the reflections on the surface to the intricate lines and curves. Post-processing enables you to enhance these details and make them stand out, giving your images that extra punch. The sharpening tool in your editing software is your best friend in this endeavor. By subtly increasing the sharpness and clarity of the image, you can bring out the intricate details and add a sense of depth to your photos.
In addition to sharpening, there are other techniques you can use to enhance the details in your automotive photos. One such technique is called dodging and burning, where you selectively lighten or darken specific areas of the image to create more contrast and emphasis. This technique can be particularly effective in highlighting the contours and textures of the car, making it look more three-dimensional and dynamic.
Composition and Cropping
While post-processing primarily focuses on adjusting the colors and details, it also provides an opportunity to refine the composition and framing of your automotive photos. Sometimes, a slight adjustment in cropping can make a huge difference in the overall impact of the image. Experiment with different cropping ratios to find the composition that best showcases the car and its surroundings. Cropping can help eliminate distracting elements and create a more balanced and visually pleasing composition.
In addition to cropping, you can also make use of other composition techniques such as leading lines, rule of thirds, and framing. These techniques can be applied both during the photoshoot and in post-processing to guide the viewer’s eye and create a more visually engaging image. By paying attention to the composition, you can take your automotive photography to the next level.
The Importance of Post-Processing Workflow
A well-organized post-processing workflow is essential for maximizing your efficiency and ensuring consistent results in your automotive photography. Having a structured workflow helps streamline the editing process, allowing you to focus on the creative aspects rather than getting lost in the technicalities. Here are some key steps to include in your post-processing workflow:
Start with File Organization
Before diving into the editing process, it’s important to have a system in place for organizing and managing your image files. Create a folder structure that makes sense to you and allows for easy access to your automotive photos.
This could be based on date, location, or any other criteria that is relevant to your photography. By keeping your files well-organized, you can save time searching for specific images and ensure that nothing gets lost or overlooked.
Import and Backup
Once you have your files organized, it’s time to import them into your editing software. Most programs offer a simple import feature that allows you to bring your RAW files into the workspace. At this stage, it’s crucial to create backup copies of your files to protect against any potential loss or corruption. Make it a habit to regularly back up your work to external hard drives or cloud storage, ensuring that your precious automotive photos are safe and secure.
Global Adjustments
After importing and backing up your files, you can start making global adjustments to your images. This includes adjusting the exposure, white balance, and overall tone of the image to achieve a balanced and cohesive look. Use the histogram and other tools provided in your editing software to fine-tune the exposure and ensure that the highlights and shadows are well-maintained. This step lays the foundation for further enhancements in the editing process.
Selective Editing and Retouching
Once you have the global adjustments in place, it’s time to focus on selective editing and retouching. This involves working on specific areas of the image to enhance the details, remove distractions, and make the car shine. You can use tools like the spot healing brush, clone stamp, and adjustment brushes to target specific areas and make precise edits. Remember to work in layers and use masks to ensure non-destructive editing, allowing you the flexibility to make changes later if needed.
Final Touches and Exporting
After completing the necessary adjustments and Enhance Your Automotive Photos, it’s time for the final touches. This includes applying any artistic effects, adding vignettes, and sharpening the image for web or print.
Experiment with different styles and effects to find the look that best suits your vision for the photograph. Once you are satisfied with the result, it’s time to export your image. Choose the appropriate file format and resolution based on the intended use of the image, whether it’s for online sharing or printing.
Key Takeaways: Enhance Your Automotive Photos with Post-Processing
- Post-processing can help improve the quality and appearance of your automotive photos.
- Using editing tools like Adobe Lightroom or Photoshop, you can adjust colors, contrast, and sharpness.
- Remove unwanted distractions from the background to make your car stand out.
- Experiment with different filters and effects to add a unique touch to your photos.
- Remember to save your original photos before making any edits, in case you need to go back to them.
Frequently Asked Questions
Enhancing your automotive photos with post-processing can make a huge difference in the final look and feel of your images. From adjusting colors to removing distractions, post-processing can take your photographs to the next level. Here are some common questions and answers about enhancing automotive photos with post-processing:
1. How does post-processing help improve automotive photos?
Post-processing allows you to fine-tune your images and correct any issues that may have occurred during the photoshoot. By adjusting brightness, contrast, and saturation, you can make your automotive photos look more vibrant and visually appealing.
Additionally, post-processing software often provides tools for removing blemishes, dust, or other distracting elements from your images, resulting in cleaner and more professional-looking photographs.
Furthermore, post-processing can also help with cropping and straightening your images, aligning them more accurately and creating a better composition. By utilizing these various techniques, you can enhance the overall quality and visual impact of your automotive photos.
2. What software or tools are commonly used for post-processing automotive photos?
There are several popular software options available for post-processing automotive photos. Adobe Photoshop and Adobe Lightroom are widely used by photographers for their extensive editing capabilities and user-friendly interfaces. Both programs offer a wide range of tools, from adjusting colors and exposure to removing unwanted objects and applying filters.
In addition to these professional software solutions, there are also free alternatives such as GIMP and Darktable, which offer similar features and capabilities. These tools provide photographers with the ability to enhance and transform their automotive photos, regardless of their budget or level of expertise.
3. Is post-processing only for experienced photographers?
Post-processing is not limited to experienced photographers. While it may take some time to learn and master the different techniques and tools, there are plenty of resources available to help beginners get started. Online tutorials, courses, and user-friendly software interfaces make it accessible for photographers of all levels to enhance their automotive photos through post-processing.
Remember, even simple adjustments like adjusting brightness or adjusting the color balance can make a noticeable difference in your images. Start with basic edits and gradually explore more advanced techniques as you become more comfortable with the post-processing workflow.
4. Can post-processing be used to make older or lower quality automotive photos look better?
Yes, post-processing can be highly effective in improving the look of older or lower-quality automotive photos. By using techniques such as noise reduction, sharpening, and adjusting levels, you can reduce the appearance of graininess, enhance details, and correct exposure issues that may be present in these images.
While post-processing cannot magically transform a heavily distorted or blurred image into a masterpiece, it can significantly enhance the overall quality and visual appeal of your automotive photos, even if they were taken with older or lower-quality equipment.
5. Are there any ethical considerations when enhancing automotive photos with post-processing?
When it comes to post-processing automotive photos, it’s important to maintain ethical standards. While it’s acceptable to enhance and optimize the visual aspects of your images, it’s crucial to avoid misleading or misrepresenting the subject matter. Avoid excessive manipulation that may alter the appearance of the vehicle or deceive viewers about its actual condition or features.
Transparency is key, especially if you are representing an automotive product or selling a vehicle. Disclose any significant modifications or effects applied to the photos during the post-processing stage to ensure honesty and integrity in your representation of the subject matter.
Photoshop for Car Photography & Automotive Post-Processing Tutorial
Summary
Ready to make your car photos look even better? Post-processing is the key! With just a few simple editing techniques, you can enhance the colors, sharpness, and overall appeal Enhance Your Automotive Photos. Start by adjusting the brightness and contrast to make your subject stand out.
Then, play around with the saturation and vibrancy to bring out the vibrant tones of the car’s paint job. Don’t forget about sharpening to give your photo that crisp, detailed look.
Finally, consider adding some creative filters or effects to make your pictures truly unique. With post-processing, you can take your automotive photography to the next level! So, what are you waiting for? Grab your camera, take some awesome car shots, and let your creativity shine through post-processing.
Whether you’re a photography enthusiast or just starting out, these techniques will help you capture stunning automotive photos that will impress everyone.
Remember, practice makes perfect, so keep experimenting and refining your skills. With a little time and effort, you’ll be taking professional Enhance Your Automotive Photos in no time. Happy shooting!