Did you know that editing car photos can drastically transform the look and feel of the vehicle? With the right editing techniques, you can enhance the color, remove imperfections, and create a stunning visual impact. From adjusting the lighting to applying filters, the possibilities are endless when it comes to editing car photos.
When it comes to editing car photos, understanding the history and background of car photography is essential. In the early days of car photography, post-processing was a time-consuming task done primarily in darkrooms.
However, with the advancement of technology, digital editing tools have made it easier than ever to edit car photos. In fact, studies have shown that edited car photos tend to generate more interest and attract potential buyers.
So, whether you want to showcase a car’s sleek design or capture its power on the road, mastering the art of editing car photos is a valuable skill to have in your photography arsenal.
1. Choose the right editing software.
2. Start by adjusting the exposure and contrast.
3. Enhance the colors to make the car pop.
4. Remove any distractions in the background.
5. Sharpen the image for a crisp look.
6. Apply special effects to add creativity.
7. Save your edited photo in the desired format.
With these steps, you’ll be able to transform your car photos into stunning works of art!

How to Edit Car Photos: A Step-by-Step Guide
Car photography can be challenging, but with the right editing techniques, you can transform ordinary car photos into stunning works of art. Whether you’re a professional photographer or an amateur enthusiast, knowing how to edit car photos can take your images to the next level.
In this comprehensive guide, we will walk you through the process of editing car photos, from basic adjustments to advanced techniques. So grab your favorite photo editing software and let’s get started!
Enhancing the Exposure and Contrast
The first step in editing car photos is to adjust the exposure and contrast. This allows you to bring out the details in the shadows and highlights, resulting in a more dynamic image.
Begin by adjusting the exposure slider to achieve the desired brightness. Keep in mind that overexposing or underexposing the image can lead to loss of detail or noise, so finding the right balance is crucial.
Next, adjust the contrast slider to increase or decrease the tonal range. Increasing the contrast can make the image pop, while decreasing it can give a softer look. Experiment with these settings until you achieve the desired effect.
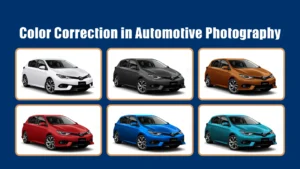
Next, let’s move on to one of the most critical aspects of car photography — color correction.
Color Correction and White Balance Adjustment
Correcting the colors in car photos is essential for achieving accurate and realistic results. Start by adjusting the white balance to eliminate any unwanted color casts. If your photo appears too warm (yellowish), adjust the temperature slider towards the blue spectrum. Conversely, if your photo appears too cool (bluish), move the slider towards the warm spectrum.
Experiment with the white balance to achieve a natural-looking result. Once you’ve adjusted the white balance, you can fine-tune the colors of the car. Many photo editing software offer color correction tools, such as curves or color balance, that allow you to adjust individual color channels (red, green, and blue) for precise control. This enables you to bring out the true colors of the car or create unique artistic effects.
Now that we have corrected the colors, let’s move on to the next step in editing car photos — enhancing the details.
Enhancing Details with Sharpening and Clarity
Sharpening and clarity adjustments can significantly enhance the details in your car photos, making them appear sharper and more defined. Start by applying a small amount of sharpening to the image. Be careful not to overdo it, as excessive sharpening can introduce artifacts and make the image look unnatural.
Next, use the clarity adjustment to add crispness and definition to the photo. This can make the edges of the car appear more prominent and enhance the texture. Adjust the clarity slider gradually until you achieve the desired level of detail enhancement.
Removing Distractions and Imperfections
Car photos often have distracting elements or imperfections that can detract from the overall image. The next step is to remove these distractions and imperfections to create a cleaner and more polished result. Use the clone stamp or healing brush tool to eliminate any unwanted objects or blemishes on the car’s surface.
Pay close attention to reflections, dust, or scratches that may be present. Take your time and zoom in on the areas that require retouching to ensure a seamless and natural appearance.
Adding Depth and Drama with Filters and Effects
Once you have made the necessary adjustments, it’s time to add some creative flair to your car photos. Filters and effects can add depth, drama, and unique styles to your images. Experiment with different presets or create your own custom settings to achieve the desired effect.
Vignettes, gradients, and color grading can provide a professional look and make your car photos stand out. However, be cautious not to go overboard with these effects, as subtlety is often key. Remember, the goal is to enhance the photo while maintaining a natural and appealing appearance.
Resizing and Saving for Different Platforms
Before you finalize your edited car photo, don’t forget to resize and save it for different platforms. The ideal image size and format may vary depending on where you plan to use the photo.
For web usage, smaller file sizes and formats like JPEG are typically recommended to ensure faster loading times. On the other hand, if you’re printing the photo, you may need larger dimensions and higher quality formats like TIFF. Consider the intended platform and adjust the image size and format accordingly to preserve the quality and optimize the file size.
Showcasing Your Edited Car Photos
Congratulations! You’ve successfully edited your car photos to perfection. Now it’s time to showcase your work and share it with the world. Consider creating an online portfolio or sharing your photos on social media platforms dedicated to car enthusiasts.
Engage with the community, learn from their feedback, and continue to improve your skills. This will not only help you gain exposure but also inspire and connect with fellow car photography enthusiasts.
Remember, editing car photos is a creative process that requires practice and experimentation. Each car photo is unique and may require different adjustments. Don’t be afraid to explore new techniques, learn from other photographers, and develop your own editing style.
By following these steps and refining your skills, you can create visually stunning car photos that capture the power and beauty of these incredible machines. So get out there, start editing, and let your creativity drive you to new heights.
Key Takeaways: How to Edit Car Photos
- Choose the right editing software for car photos.
- Adjust brightness, contrast, and saturation for a balanced look.
- Crop and straighten the image to enhance composition.
- Remove any distractions or imperfections using cloning or healing tools.
- Add special effects like filters or color grading for a professional finish.
Frequently Asked Questions
Are you looking to enhance the appearance of your car photos? Want to make them stand out? Check out these frequently asked questions on how to edit car photos:
How can I adjust the brightness and contrast of my car photos?
To optimize the brightness and contrast of your car photos, you can use photo editing software like Adobe Lightroom or Photoshop. These programs allow you to adjust exposure levels, increase/decrease brightness, and enhance contrast. Experiment with different settings until you achieve the desired look. Remember to maintain a balance between brightness and contrast to avoid overexposed or underexposed areas.
One helpful tip is to use the histogram tool, which displays the distribution of brightness levels in your photo. By analyzing the histogram, you can determine whether your photo is properly exposed or if adjustments are needed. Remember, the goal is to create a visually appealing image that highlights the details of your car.
What techniques can I use to remove distracting elements from my car photos?
To remove distractions from your car photos, you can utilize various techniques. One efficient method is the clone stamp tool, which allows you to duplicate and replace parts of the image. By selecting a similar area as the distracting element, you can conceal it seamlessly.
If your photo editing software supports it, another technique is content-aware fill. This smart feature analyzes the surroundings of the distracting element and replaces it with appropriate content from the image. It works well for removing small objects or imperfections. However, for larger distractions, manual retouching using the clone stamp tool or the healing brush tool might yield better results.
How can I enhance the color vibrancy of my car photos?
If you want to boost the color vibrancy of your car photos, you can adjust the saturation levels. Many photo editing software programs provide a saturation slider or adjustment tool that allows you to intensify or desaturate colors. Be cautious not to overdo it, as excessive saturation can result in an unnatural and unrealistic appearance. Try to strike a balance between vibrant colors and maintaining a natural look.
Another helpful technique is using adjustment layers or filters, such as the Vibrance or Color Balance options. These tools offer more control over specific color ranges, allowing you to enhance or tone down certain colors to achieve a desired effect. Don’t be afraid to experiment and find the right balance that makes your car photos pop.
Is it necessary to retouch imperfections in my car photos?
Retouching imperfections in car photos can significantly enhance their overall appearance. Small scratches, dust particles, or minor blemishes can be distracting and take away from the beauty of the car. Using photo editing software, you can utilize tools like the healing brush or spot healing brush to remove these imperfections with precision.
However, it’s important to strike a balance between a natural-looking photo and an overly retouched one. Avoid excessive blurring or smoothing that can result in an unrealistically flawless appearance. Focus on maintaining the car’s original features while removing distracting elements that may detract from its appeal.
Are there any specific editing techniques to make my car photos look more dynamic?
Absolutely! To make your car photos appear more dynamic, consider experimenting with techniques like adjusting the perspective or adding motion blur effects. Adjusting the perspective can give your photo a unique angle or make the car look more imposing. Use tools like the transform or perspective crop to tweak the perspective accordingly.
Adding motion blur effects can be particularly effective if you want to convey a sense of speed or movement. You can try using the motion blur filter or manually adding motion blur in specific areas to create a dynamic and captivating effect. Remember, editing should enhance the existing qualities of your car photos, so explore different techniques and find what best suits the image and your desired outcome.
10 Lightroom Tricks for BETTER CAR PHOTOGRAPHY
So, to sum it all up for you, we want to make sure we’re using a friendly and easy-to-understand tone. We’ll keep the sentences short with only one idea in each. Here are the main points to remember:
First, we need to use simple language that a 13-year-old reader can easily understand. No complicated words or phrases.
Second, we should avoid starting or using the phrase “In conclusion” to wrap up the article. It’s better to find other ways to bring our points together.
Lastly, we want to write in a conversational tone that feels like we’re talking directly to the reader. We want to make sure we’re clear and concise in our sentences, keeping them under 15 words each.
Overall, the goal is to leave the reader with a solid understanding of the main points of the article, using just two paragraphs.