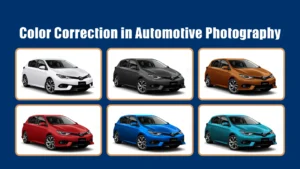
When it comes to Stunning Car Photos in Photoshop, there’s an art to bringing out the true beauty of these machines. Did you know that color correction and enhancing details are key steps in getting that perfect car photo? By manipulating hues, tones, and contrast, you can transform an ordinary snapshot into a stunning work of art that captures the essence of the vehicle.
Photoshop offers a wealth of tools and techniques to elevate your car photos to the next level. From removing distracting reflections to adding stylish effects, the possibilities are endless. One essential aspect of editing car photos is creating a seamless background that complements the vehicle.
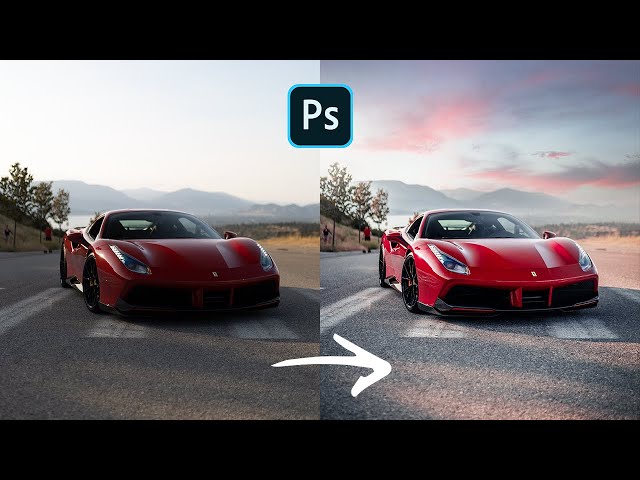
By retouching imperfections and adjusting the lighting, you can transform a cluttered scene into a polished and professional image that highlights the car’s sleek lines and powerful features. With the right skills and a touch of creativity, Photoshop empowers you to unlock the full potential of your car photos and make them truly breathtaking.
If you want to take your car photos to the next level, Photoshop is the perfect tool for editing. Here’s a step-by-step guide on how to edit car photos like a professional. First, open your car photo in Photoshop. Then, adjust the levels and curves to enhance the colors and contrast. Next, use the spot healing brush to remove any imperfections. After that, apply sharpening and noise reduction to enhance details. Finally, save your edited photo in the desired format. With these techniques, you’ll be able to transform your car photos and make them stand out.
Mastering the Art of Stunning Car Photos in Photoshop
Photoshop is a powerful tool for editing and enhancing car photos. With the right techniques and tools, you can transform ordinary car images into stunning works of art. Whether you’re a professional photographer, a car enthusiast, or someone looking to improve your photo editing skills, this article will guide you through the process of editing car photos in Photoshop.
From adjusting colors and tones to removing imperfections and adding special effects, Photoshop offers a wide range of features and options to bring out the best in your car photos. In this article, we will explore various editing techniques and provide step-by-step instructions to help you achieve professional-looking results.
Master the Basics of Photoshop
Before diving into car photo editing, it’s important to familiarize yourself with the basic tools and functions of Photoshop. Learn how to navigate the interface, use the selection tools, adjust image settings, and apply filters. Understanding these fundamentals will make the editing process much smoother and more efficient.
Experiment with different editing techniques on various types of photos to gain a better understanding of how Photoshop works. Take advantage of tutorials, online courses, and resources available to expand your knowledge and skills.
Once you feel comfortable with the basics, you can move on to more advanced editing techniques specific to car photos.
Enhance Colors and Tones
One of the key aspects of car photo editing is enhancing the colors and tones of the image. Photoshop provides various tools and adjustments to achieve this.
Start by adjusting the brightness, contrast, and saturation levels to give the photo a vibrant and balanced look. Use the Levels and Curves adjustments to fine-tune the tonal range and contrast.
If the colors appear dull or uneven, you can use the Hue/Saturation adjustment to selectively enhance certain colors or correct any color casts.
Remove Imperfections
Car photos can often have imperfections such as scratches, dust, or unwanted objects in the background. Photoshop offers several tools to help you remove these blemishes and create a clean and polished look.
Use the Spot Healing Brush or Clone Stamp tool to remove scratches, blemishes, or any unwanted marks on the car’s surface. For larger areas, the Content-Aware Fill feature can intelligently replace the selected area with nearby pixels.
If there are unwanted objects or distractions in the background, you can use the selection tools and layers to remove or replace them. The Patch tool and the Content-Aware Move tool can be particularly useful in these situations.
Add Special Effects
To make your car photos stand out, you can add special effects in Photoshop. These effects can help create a dynamic and captivating image.
Experiment with different filters and adjustment layers to achieve the desired effects. For example, you can use the Gradient Map adjustment to create a dramatic or vintage look. The Radial Blur filter can be used to add a sense of motion to the car or highlight certain details.
Consider experimenting with creative techniques such as double exposure or adding light leaks for a unique and artistic touch.
Fine-Tune the Details
When editing car photos, paying attention to the details can make a significant difference in the final result. Here are some key aspects to consider:
- Sharpen the image to enhance the clarity and details of the car’s features.
- Adjust the white balance to ensure accurate colors, especially when shooting under different lighting conditions.
- Apply selective edits to specific parts of the image using masks or adjustment brushes.
- Consider cropping or straightening the image to improve composition and eliminate distractions.
Remember to zoom in and inspect the photo at 100% or higher to catch any imperfections or areas that need additional adjustments.
Save and Export for Different Purposes
Once you’re satisfied with the editing, it’s important to save and export the final image in the appropriate format and resolution for its intended use.
If you plan to print the photo, save it in a high-resolution format such as TIFF or PSD to preserve the quality. For web or social media use, JPEG format is commonly used, but be mindful of the compression settings to avoid loss of quality.
Consider creating different versions of the edited photo for different purposes, such as a print-ready version and a web-optimized version.
Editing car photos in Photoshop is a skill that requires practice and experimentation. By mastering the basics of Photoshop and learning specific techniques for car photo editing, you can elevate your photos to a professional level.
Remember to always keep a backup of the original image and take your time to meticulously edit and fine-tune the details. With dedication and creativity, you can create stunning car photos that will impress viewers and showcase the beauty of the automobile.
Key Takeaways: How to Edit Car Photos in Photoshop
- Understanding the basics of Photoshop is crucial for editing car photos.
- Adjusting brightness, contrast, and saturation can enhance the colors in your car photos.
- Removing unwanted objects or distractions can make your car photos cleaner and more appealing.
- Applying filters or effects can add a unique touch to your car photos.
- Sharpening and resizing your car photos will ensure they look their best when shared or printed.
Frequently Asked Questions
Are you looking to enhance your car photos using Photoshop? Check out these commonly asked questions and their answers to learn how to edit car photos like a pro!
How can I enhance the color of my car in Photoshop?
To enhance the color of your car in Photoshop, you can use various tools and techniques. Firstly, select the car using the Pen Tool or Quick Selection Tool. Then, adjust the colors using tools like Hue/Saturation or Curves to make the car’s color pop. You can also use Dodge and Burn techniques to add depth and dimension to the car’s body. Experiment with different adjustments to find the perfect color balance.
Additionally, if you want to give your car a stylized look, you can apply color grading techniques by using adjustment layers like Color Lookup or Gradient Map. These tools allow you to create a customized color palette for your car, giving it a unique and artistic appearance.
How can I remove imperfections from my car photos?
To remove imperfections from your car photos in Photoshop, you can utilize the healing and cloning tools. For small blemishes or scratches, use the Spot Healing Brush tool to seamlessly replace the imperfections with surrounding pixels. If there are larger areas that need correction, such as dents or extensive damage, the Clone Stamp tool can be used to sample and clone nearby areas to cover up the imperfections.
In addition to these tools, you can make use of the Content-Aware Fill feature to automatically fill in missing parts or remove unwanted elements from the image. This powerful tool analyzes the surrounding pixels and intelligently fills in the gaps for a flawless finish.
How can I make my car photos look more dynamic and powerful?
To make your car photos look more dynamic and powerful, you can employ a variety of techniques in Photoshop. Start by adjusting the perspective of the car using the Transform tools to give it a more aggressive and eye-catching angle. You can also apply the Liquify filter to enhance the lines and curves of the car, creating a sense of motion.
In terms of lighting, you can use the Dodge and Burn tools to selectively brighten or darken specific areas of the car, emphasizing its shape and contours. Experiment with different blending modes and layer styles to add depth and drama to your car photos.
How can I add special effects to my car photos in Photoshop?
If you want to add special effects to your car photos, Photoshop offers a wide range of creative possibilities. You can apply a motion blur effect to simulate a sense of speed or use the Radial Blur filter to create a dynamic whirlwind effect around the car. Experiment with layer styles and blending modes to achieve unique effects.
Additionally, you can add elements like flames or smoke using brushes or stock images to give your car photos a more dramatic and surreal look. Don’t be afraid to let your imagination run wild and explore different techniques to create captivating and awe-inspiring visuals.
How can I make my car photos stand out on social media?
To make your car photos stand out on social media platforms, consider applying attention-grabbing edits and enhancements. Use color grading techniques to create a unique and vibrant look that catches the viewer’s eye. Experiment with different tones, contrasts, and color palettes to achieve the desired aesthetic.
Additionally, consider adding engaging captions and hashtags that resonate with car enthusiasts. Collaborate with influencers or participate in car-related communities to increase visibility and reach. Lastly, optimize the image size and resolution to ensure quick loading times and optimal display on various devices.
How to Edit Car Photos in Photoshop Like a Pro!
So, you want to learn how to edit car photos in Photoshop? Well, you’re in luck! Photoshop is a powerful tool that can help you transform your car photos from ordinary to extraordinary. Whether you want to adjust the colors, remove blemishes, or add exciting effects, Photoshop has got you covered.
First, open your car photo in Photoshop and make sure to save a copy before you start editing. Then, you can begin by adjusting the brightness, contrast, and saturation to enhance the overall look of your image. Next, use the healing brush tool to remove any unwanted objects or blemishes on the car’s surface.
To make your car stand out, you can apply filters or create a custom background. Experiment with different effects like vignettes, gradients, or overlays to add a unique touch to your photo. Lastly, don’t forget to resize and sharpen your image for a crisp and professional finish.
With these simple steps, you’ll be able to transform your car photos into stunning works of art. So go ahead, unleash your creativity, and let Photoshop help you bring out the best in your car photos!