Are your car photos lacking that wow factor? Do you want your images to stand out from the crowd and leave a lasting impression? Look no further! In this article, we will share powerful editing tips and tricks that will transform your ordinary car photos into jaw-dropping masterpieces.
Whether you are a professional photographer or just an enthusiast with a smartphone, these techniques will take your car photography to the next level. Learn how to enhance colors, adjust lighting and shadows, remove distractions, and apply creative effects that will make your images pop.
Our expert tips and step-by-step tutorials will guide you through the editing process, ensuring impressive results every time. Discover the secrets behind professional car photography editing and unleash your creative potential.
Don’t settle for dull and ordinary car photos. With the right editing techniques, you can create stunning images that will captivate viewers and leave them in awe. Buckle up and get ready to take your car photography to new heights!
Table of Contents
ToggleThe importance of editing car photos
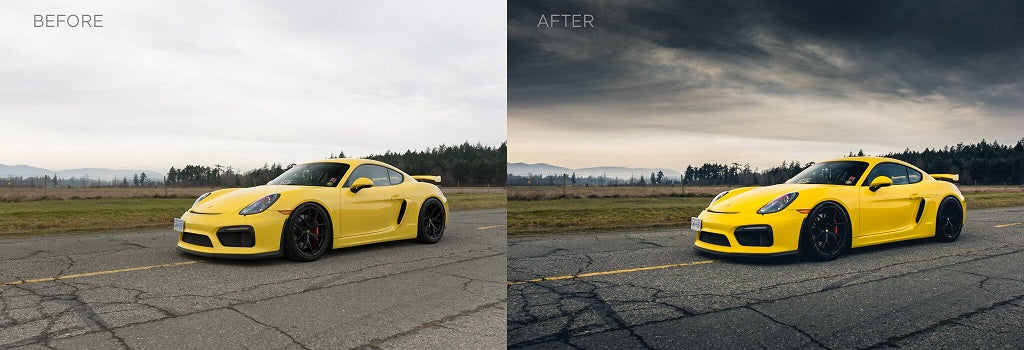
Editing plays a crucial role in transforming ordinary car photos into extraordinary masterpieces. It allows you to enhance the colors, adjust the lighting and shadows, remove imperfections, and add creative effects that can completely change the look and feel of your images.
One of the main reasons why editing is important is that it helps you bring out the true potential of your car photos. Raw images straight out of the camera often lack the vibrancy and impact needed to make them stand out. Through editing, you can enhance the colors, make the details pop, and create a visual impact that grabs the viewer’s attention.
Editing also allows you to correct any mistakes or imperfections that may have occurred during the photoshoot. Whether it’s removing unwanted objects or distractions in the background, fixing exposure issues, or adjusting the overall composition, editing gives you the power to make your car photos look flawless.
Furthermore, editing allows you to add your creative touch to your car photos. With various effects, filters, and editing techniques, you can create a unique style that reflects your vision and personality as a photographer. This artistic freedom allows you to create images that are not only visually appealing but also convey a specific mood or emotion.
In summary, editing car photos is essential to elevate your photography to the next level. It allows you to enhance colors, correct imperfections, and add creative effects that make your images stand out and leave a lasting impression. Now, let’s dive into some basic editing techniques that will help you achieve stunning results.
Basic editing techniques for car photos
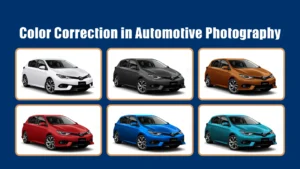
Enhancing colors and contrast for a vibrant look
The first step in editing your car photos is to enhance the colors and contrast to give them a vibrant and eye-catching look. Start by adjusting the white balance to ensure accurate color representation. This will help bring out the true colors of the car and make them look more natural.
Next, work on adjusting the exposure and contrast. Increasing the exposure can help brighten up the image and reveal more details, while adjusting the contrast can add depth and richness to the photo. Be careful not to overdo it, as it can lead to loss of details or unrealistic-looking images.
Once you’ve adjusted the exposure and contrast, you can fine-tune the colors using the saturation and vibrance sliders. Increasing the saturation can make the colors more intense and vibrant while adjusting the vibrance can add a subtle boost to the colors without making them look too saturated.
Remember to use these adjustments sparingly and make subtle changes to achieve a natural and realistic look. The goal is to enhance the colors without making them appear artificial or exaggerated.
Removing imperfections and distractions
In car photography, it’s common to have imperfections or distractions in the background that can take away from the main subject. To create a clean and professional-looking image, it’s important to remove these distractions during the editing process.
One of the most effective tools for removing distractions is the clone stamp or healing brush tool. These tools allow you to sample a part of the image and then paint over the unwanted objects or distractions, seamlessly blending them into the background.
When using the clone stamp or healing brush tool, it’s important to pay attention to details and make sure the cloned areas match the surrounding pixels. Take your time and zoom in if necessary to ensure a seamless result.
Another common imperfection in car photos is dust or scratches on the car’s surface. To remove these, you can use the spot healing brush tool or the patch tool. These tools automatically sample the surrounding pixels and blend them in to remove the imperfections.
Adding creative effects and filters
Once you’ve perfected the colors, and contrast, and removed any distractions, it’s time to add some creative effects and filters to give your car photos a unique and eye-catching look. There are various ways you can achieve this, depending on the style and mood you want to convey.
One popular technique is to create a vintage or retro look using film presets or filters. This can give your car photos a nostalgic and timeless feel, reminiscent of classic car advertisements. Experiment with different presets or manually adjust the colors and tones to achieve the desired effect.
Another creative effect you can try is adding motion blur or light trails to give the impression of speed and movement. This works particularly well for action shots or photos taken during a car race. You can achieve this effect by using the motion blur filter or by manually creating a motion blur effect using the blur tool.
Don’t be afraid to experiment with different effects and filters to find your own unique style. Remember, the goal is to enhance the overall visual impact of your car photos and make them stand out from the crowd.
Enhancing colors and contrast for a vibrant look
Tips for achieving a realistic and natural look
When editing car photos, it’s important to strike a balance between enhancing the image and maintaining a realistic and natural look. While adding creative effects can be fun and impactful, it’s crucial to avoid over-editing and making the image look artificial.
One way to achieve a realistic look is to pay attention to details such as reflections and shadows. Make sure the reflections on the car’s surface are consistent and accurate. Adjust the opacity of the reflections if necessary to create a more realistic effect.
Similarly, when adding shadows, be mindful of the direction and intensity of the light source. Shadows can add depth and dimension to your car photos, but they should look natural and not appear forced or out of place.
Another tip for achieving a realistic look is to use adjustment layers and masks to selectively edit specific areas of the image. This allows you to make targeted adjustments without affecting the entire photo. For example, you can adjust the exposure or contrast of the car without affecting the background, or vice versa.
By using these advanced editing techniques, you can create professional-looking car photos that are visually stunning and realistic.
Editing software and tools for car photo editing
To edit car photos effectively, it’s important to have the right software and tools at your disposal. There are several options available, ranging from basic editing software to professional-grade applications.
For beginners or enthusiasts, Adobe Lightroom is a popular choice. It offers a wide range of editing tools and presets that can help you achieve impressive results. Lightroom also has a user-friendly interface, making it easy to navigate and learn.
For more advanced editing, Adobe Photoshop is the industry standard. Photoshop provides extensive editing capabilities and allows for more precise and detailed adjustments. It also offers powerful tools for removing imperfections, creating complex masks, and adding creative effects.
Other software options include Capture One, DxO PhotoLab, and ON1 Photo RAW, each with its own unique features and capabilities. Explore different software options and choose the one that best suits your needs and budget.
In addition to software, investing in a high-quality monitor with accurate color representation is essential for editing car photos. This ensures that the colors you see on your screen are true to the original image and will be accurately reproduced when printed or viewed on other devices.
Resources for learning car photo editing
If you’re new to car photo editing or want to further enhance your skills, there are plenty of resources available to help you learn and improve. Online tutorials, video courses, and forums dedicated to car photography and editing can provide valuable insights and tips.
YouTube is a great platform for finding tutorials and step-by-step guides on car photo editing. Many experienced photographers and editing experts share their knowledge and techniques, allowing you to learn at your own pace.
In addition to YouTube, there are also paid online courses and workshops that offer in-depth training on car photo editing. These courses often provide comprehensive lessons, assignments, and feedback from industry professionals, ensuring a more structured and guided learning experience.
Lastly, don’t underestimate the power of practice. The more you edit and experiment with different techniques, the better you will become. Take the time to analyze and study the work of other photographers, both in the car photography industry and beyond. This will help you develop your own style and inspire new ideas for editing.
Removing imperfections and distractions
Editing car photos is a powerful tool that can take your images from ordinary to extraordinary. By enhancing colors, adjusting lighting and shadows, removing distractions, and adding creative effects, you can transform your car photos into jaw-dropping masterpieces.
Whether you’re a professional photographer or just starting out, these editing tips and tricks will help you elevate your car photography to new heights. Remember to strike a balance between enhancing the image and maintaining a realistic look, and don’t be afraid to experiment with different effects and styles.
Invest in high-quality editing software and tools, and take advantage of the resources available online to learn and improve your editing skills. With practice, patience, and a passion for car photography, you can create stunning images that leave a lasting impression.
So, what are you waiting for? Grab your camera, buckle up, and start capturing those amazing car photos. With the right editing techniques, you’ll be able to transform them into jaw-dropping masterpieces that will wow viewers and leave them in awe. Happy editing!
Adding creative effects and filters
When it comes to car photography, even the smallest imperfections or distractions can detract from the overall impact of your images. To ensure your car photos are visually appealing, it’s important to remove any blemishes or unwanted elements that may be present.
One of the most effective ways to achieve this is by using the clone stamp tool. This tool allows you to sample a specific area of the image and then paint over imperfections, seamlessly blending them into the surrounding areas. Whether it’s a scratch on the car’s body or a piece of litter in the background, the clone stamp tool can make these distractions disappear.
In addition to the clone stamp tool, you can also use the healing brush tool to remove imperfections. This tool works by analyzing the surrounding pixels and intelligently replacing the imperfection with pixels that match the surrounding area. It’s a quick and efficient way to eliminate unwanted elements without leaving any visible traces of editing.
Lastly, don’t forget to pay attention to the background of your car photos. Sometimes, a cluttered or busy background can take away from the main subject. Consider using a shallow depth of field or blurring the background slightly to make the car stand out more prominently.
By taking the time to remove imperfections and distractions, you can ensure that your car photos are visually appealing and captivating.
Advanced editing techniques for professional car photos
Want to give your car photos a unique and eye-catching look? Adding creative effects and filters can help you achieve just that. From enhancing colors to adding dramatic effects, there are countless possibilities to explore.
One popular technique is the selective color effect. This involves desaturating the entire image except for specific colors, such as the car’s vibrant red or the blue sky. By isolating these colors, you can create a striking contrast that draws attention to the subject.
Another creative effect to consider is the tilt-shift effect. This effect mimics the look of a miniature model by selectively blurring certain parts of the image. By strategically applying this effect, you can make your car photos appear as if they were taken of scale models, adding a unique and whimsical touch.
Filters are also a great way to enhance the mood and atmosphere of your car photos. Whether you want to achieve a vintage, film-like feel or a bold and vibrant look, there are filters available to suit every style. Experiment with different filters and adjust their intensity to find the perfect balance for your images.
When applying creative effects and filters, it’s important to exercise restraint. While these enhancements can elevate your car photos, it’s crucial not to overdo it. Strive for a balanced and tasteful result that enhances the overall composition without overpowering the subject.
Tips for achieving a realistic and natural look
If you’re looking to take your car photography to the next level, mastering advanced editing techniques is essential. These techniques can help you achieve professional-grade results that are sure to impress.
One technique that professionals often use is frequency separation. This technique allows you to separate the texture and color information of an image, making it easier to retouch specific areas without affecting the overall quality. It’s particularly useful for fine-tuning details such as reflections, highlights, and shadows on the car’s surface.
Another advanced technique is luminosity masking. This technique involves creating masks based on the luminosity values of an image, allowing you to selectively apply adjustments to different areas. For example, you can brighten the highlights without affecting the shadows or vice versa. Luminosity masking gives you precise control over the tonal range of your car photos, resulting in a more polished and professional look.
In addition to these techniques, learning how to use curves and levels effectively can greatly enhance your car photos. These tools allow you to adjust the tonal range, contrast, and brightness of an image, giving you complete control over its overall look and feel.
Remember, mastering advanced editing techniques takes time and practice. Don’t be discouraged if you don’t achieve the desired results right away. Keep experimenting and learning, and soon you’ll be able to create professional car photos that truly stand out.
Resources for learning car photo editing
When it comes to editing car photos, having the right software and tools can make all the difference. There are several options available, each with its own set of features and capabilities.
Adobe Photoshop is one of the most popular and versatile editing software options. It offers a wide range of tools and features that allow you to retouch, enhance, and manipulate your car photos with precision. From basic adjustments to advanced techniques, Photoshop has everything you need to take your editing skills to the next level.
If you’re looking for a more user-friendly and intuitive option, Adobe Lightroom is an excellent choice. Lightroom is specifically designed for photographers and offers powerful editing capabilities in a streamlined interface. It allows you to organize and edit your car photos efficiently, making it a favorite among professionals and enthusiasts alike.
In addition to these industry-standard software options, there are also several free alternatives available. GIMP and Pixlr are two popular choices that offer a range of editing tools and features similar to Photoshop. While they may not have all the advanced capabilities of paid software, they are more than sufficient for basic editing tasks.
When it comes to tools, investing in a high-quality monitor with accurate color reproduction is essential. This ensures that the colors and tones you see on your screen are true to the original image. Additionally, a graphics tablet can greatly enhance your editing workflow, allowing for more precise and natural adjustments.
Take the time to explore different software options and tools to find the ones that best suit your needs and preferences. Remember, the software and tools are just means to an end – it’s your creativity and skill that will ultimately determine the quality of your car photos.
Conclusion: Elevate your car photography with editing techniques
If you’re new to car photo editing or looking to expand your skills, there are plenty of resources available to help you along the way. From tutorials to online courses, you can find a wealth of information that will guide you through the editing process.
YouTube is a great starting point for finding tutorials on car photo editing. Many professional photographers and editing experts share their knowledge and techniques through video tutorials. These tutorials often cover a wide range of topics, from basic editing tips to advanced techniques, allowing you to learn at your own pace.
Online photography communities and forums are another valuable resource for learning car photo editing. These communities bring together photographers of all skill levels, providing a platform for sharing knowledge and discussing editing techniques. Participating in these communities can not only help you learn new editing techniques but also provide valuable feedback on your work.
If you prefer a more structured approach, there are several online courses and workshops dedicated to car photo editing. These courses offer in-depth instruction and hands-on practice, allowing you to develop your editing skills under the guidance of experienced instructors. Whether you’re a beginner or an advanced photographer, there’s a course out there that can help you take your car photo editing to the next level.